Import CSV
AssetFlow's CSV import lets you bulk-import assets and cash flows from spreadsheet exports. This is the fastest way to get started with an existing portfolio or update your holdings in bulk.
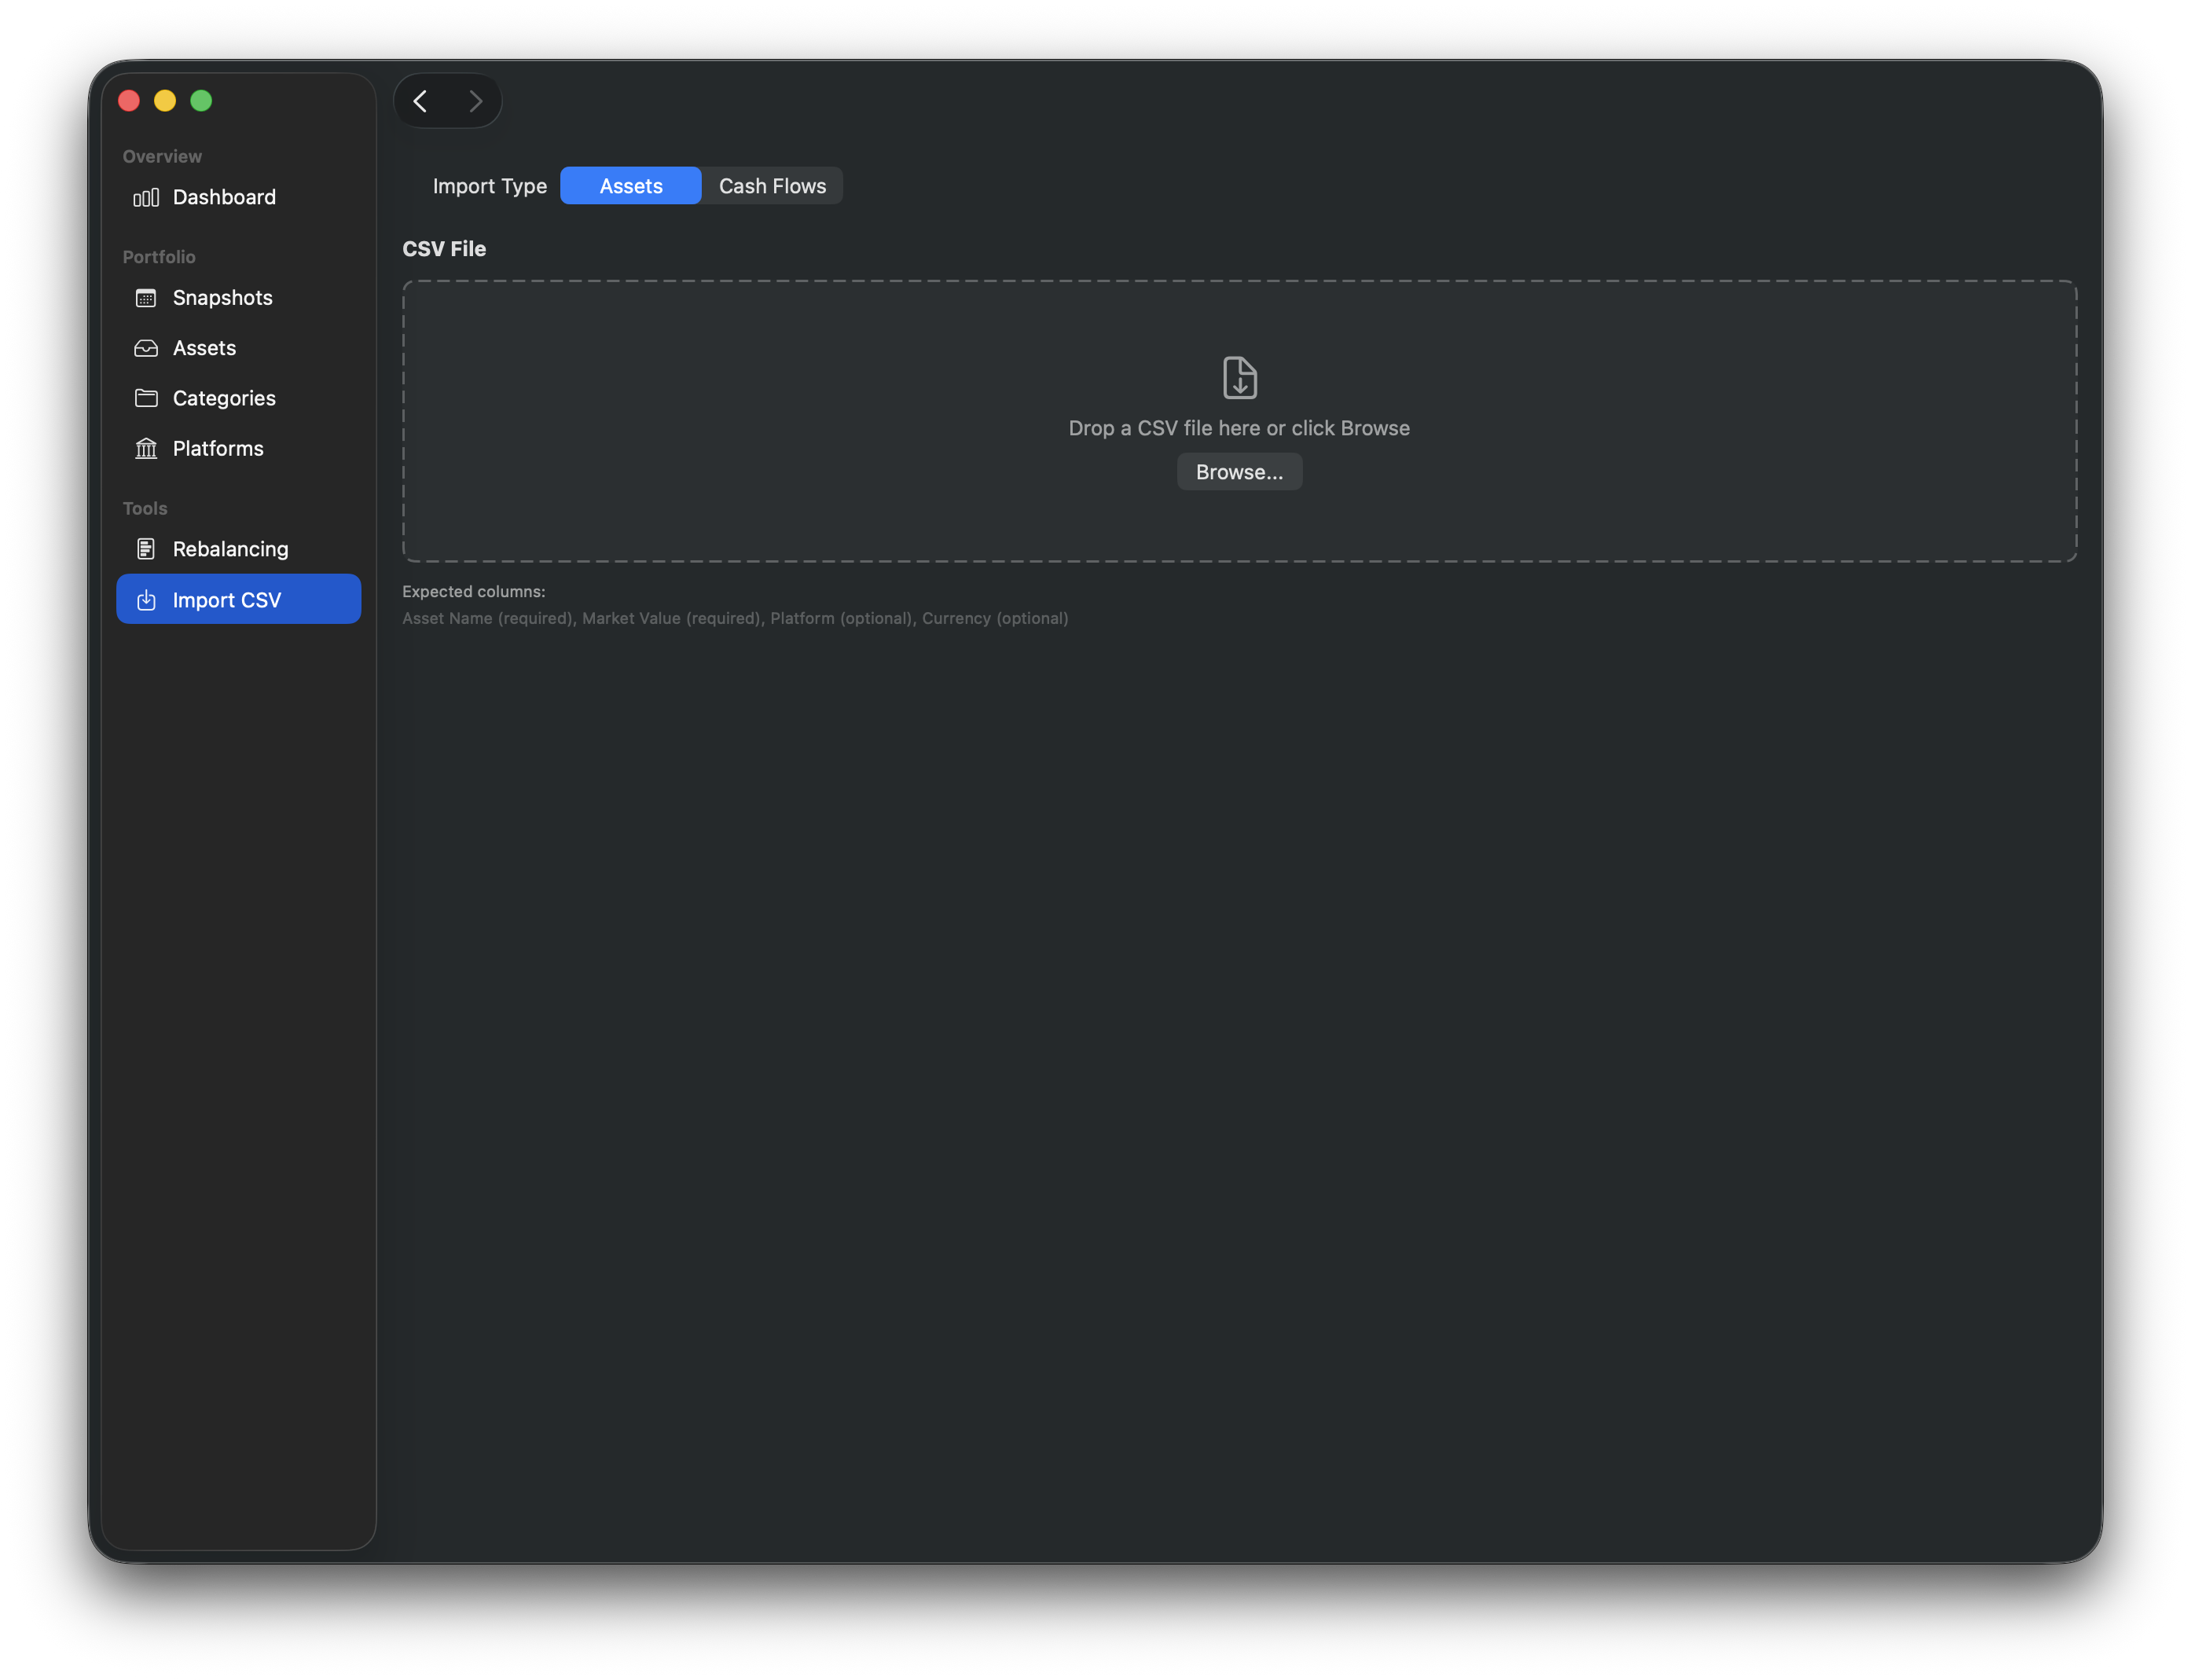
Opening the Import Tool
Navigate to Tools > Import CSV in the sidebar, or press Cmd+I.
At the top of the import view, toggle between Assets and Cash Flows to choose what you'd like to import.
Importing Assets
Step 1: Select File
Drag and drop a CSV file onto the import area, or click Browse to select one from Finder.
Your file should include at least these columns:
| Column | Required | Description |
|---|---|---|
| Asset Name | Yes | The name of the asset |
| Market Value | Yes | The current market value |
| Platform | No | Which platform holds this asset |
| Currency | No | The asset's currency code (e.g., USD, TWD) |
Tip
Your CSV doesn't need to use these exact column names. If the headers don't match, AssetFlow will show a column mapping sheet where you can assign each CSV column to the correct field. See Column Mapping below.
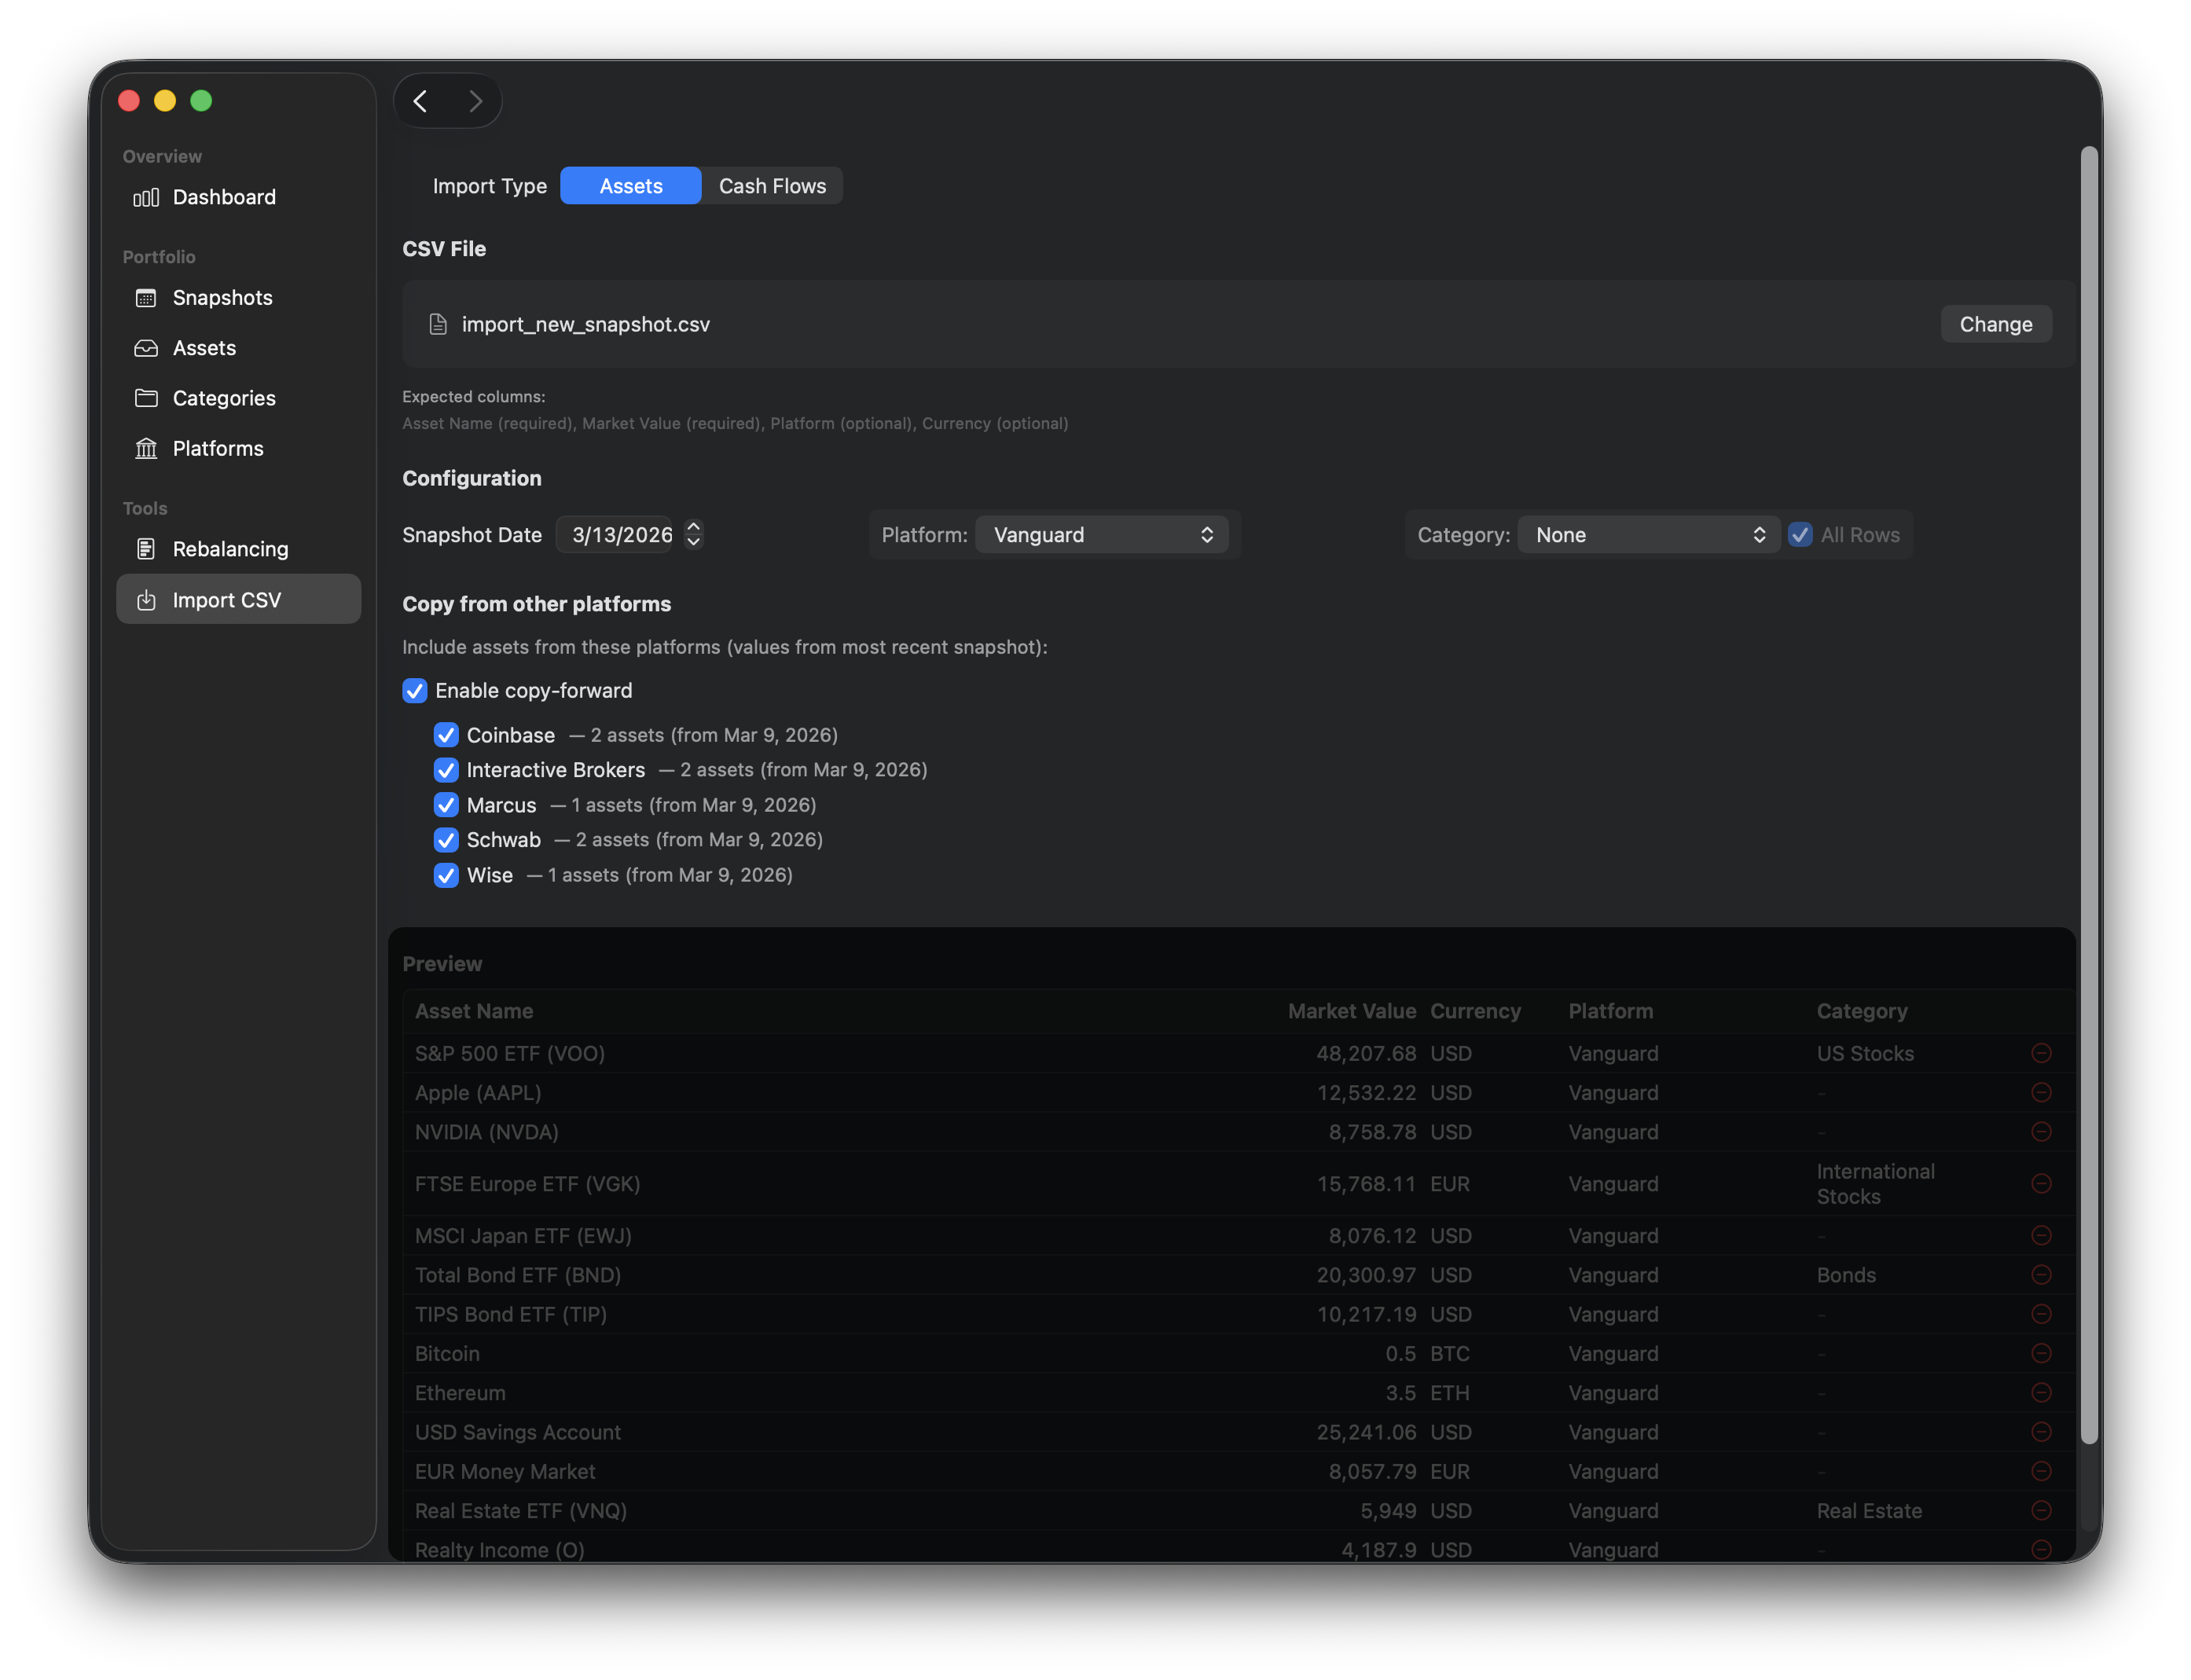
Step 2: Configure
Before importing, you can fine-tune how the data is brought in:
- Snapshot Date — choose which date this snapshot represents.
- Platform — optionally assign a platform. You can create a new platform inline if needed. Check All Rows to apply it to every imported asset, or leave it unchecked to only fill in rows that don't already have a platform from the CSV.
- Category — optionally assign a category. You can create a new category inline as well. The All Rows checkbox works the same way — check it to override all rows, or leave it unchecked to only fill blanks.
- Copy Forward — toggle this on to carry forward assets from other platforms that aren't included in this CSV. This is useful when you're importing from one brokerage but want to keep assets from others in the same snapshot.
- Select which platforms to copy forward from.
- Each option shows the asset count and source snapshot date.
Step 3: Review & Import
The preview table shows all parsed rows along with their validation status:
- Errors (red) — these block the import and must be fixed. Common causes include missing required columns, duplicate assets, or unparsable values.
- Warnings (yellow) — these allow the import but flag potential issues, such as zero values or unrecognized currency codes.
You can remove problematic rows directly from the preview before importing.
When everything looks good, click Import.

Warning
If a snapshot already exists for the selected date, the import will update it rather than creating a new one. Assets with a value of 0 in the existing snapshot will be overwritten by the imported values.
Importing Cash Flows
The cash flow import follows a similar workflow. Your CSV should include:
| Column | Required | Description |
|---|---|---|
| Description | Yes | A label for the cash flow (e.g., "Monthly deposit") |
| Amount | Yes | Positive for deposits, negative for withdrawals |
| Currency | No | The currency code |
Cash flows are imported into a specific snapshot that you select during configuration.
Column Mapping
If your CSV file uses different column names (e.g., "Symbol" instead of "Asset Name", or "Price" instead of "Market Value"), AssetFlow automatically detects the mismatch and shows a column mapping sheet after you select the file.
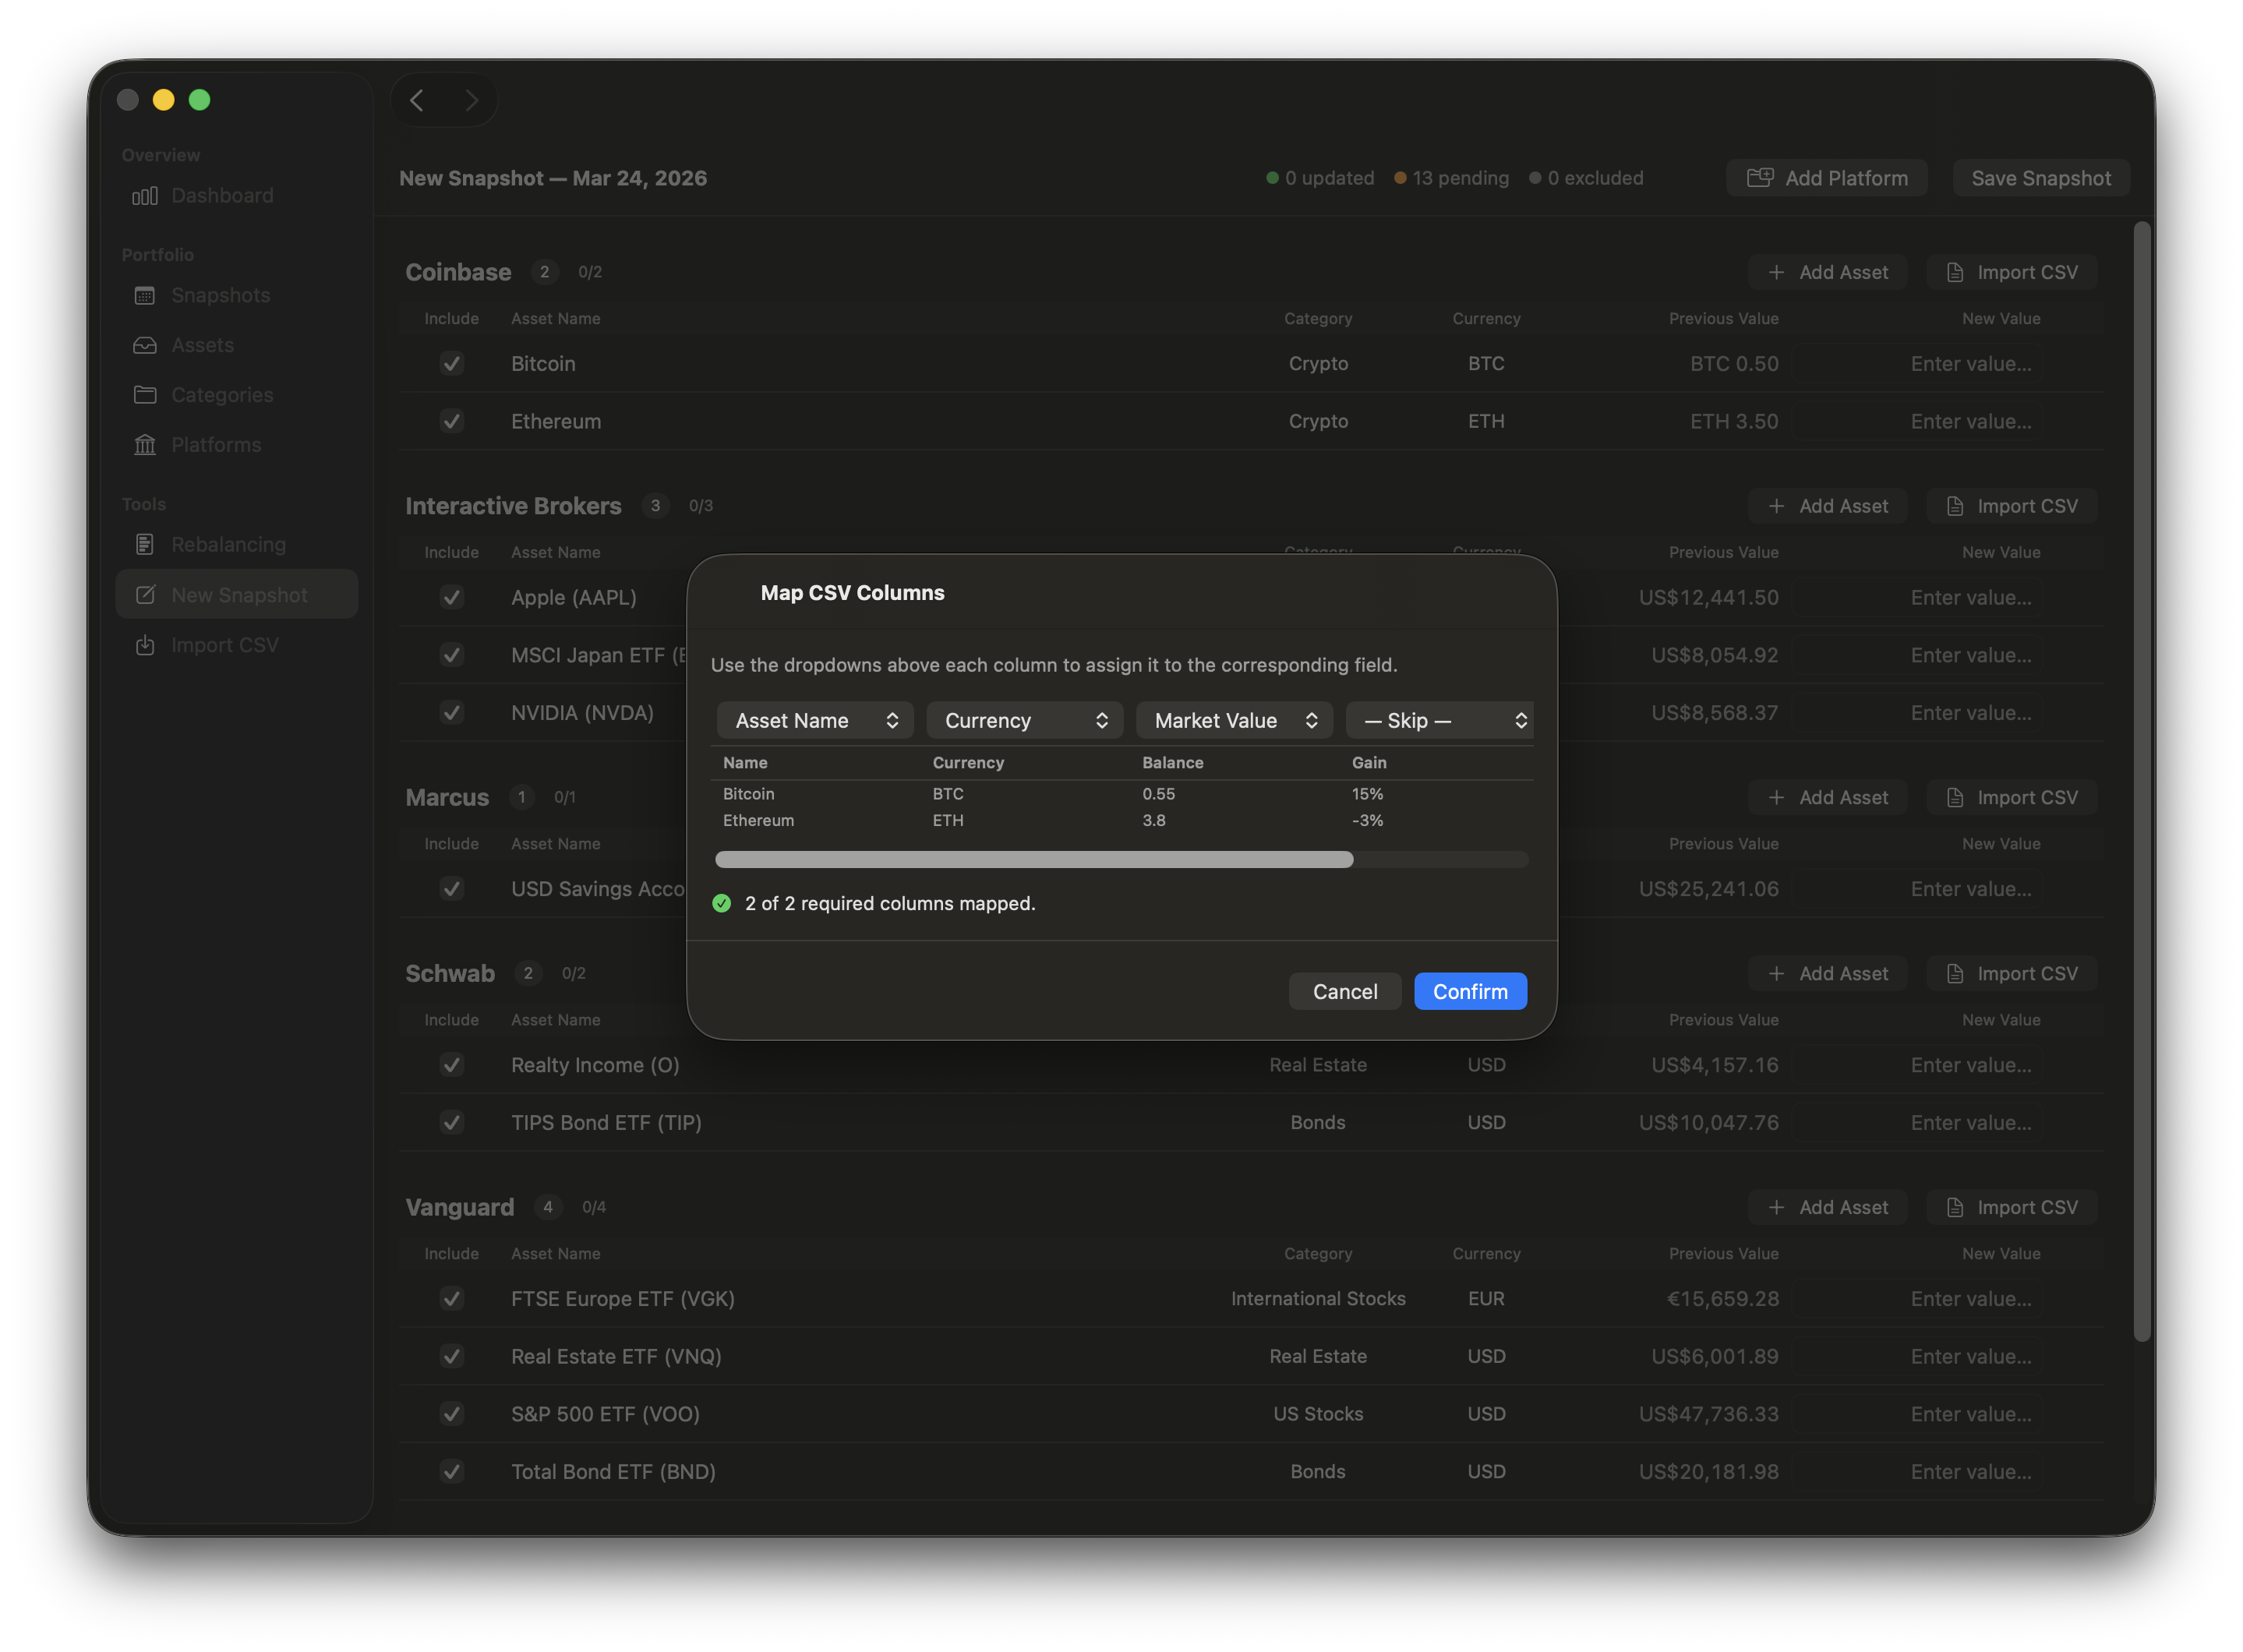
The sheet displays a preview of your CSV data with a dropdown above each column. Use the dropdowns to assign each CSV column to the corresponding AssetFlow field, or leave it as — Skip — to ignore that column.
- Auto-detection: If the CSV headers already match the expected column names (case-insensitive), the mapping sheet is skipped entirely and parsing proceeds immediately.
- Pre-selection: Columns that partially match (e.g., "Currency" is recognized even when "Asset Name" is not) are preselected automatically.
- Validation: The Confirm button is disabled until all required columns are assigned. If two columns are mapped to the same field, a warning is shown and the conflicting dropdowns are highlighted in red.
- Re-mapping: To change the mapping after confirming, simply re-select the file. The mapping sheet will appear again.
Note
Column mapping is also available for per-platform CSV imports in the Bulk Entry view. In that case, the Platform option is not shown since the platform is already determined by which section you're importing into.
Tip
You can also import CSV files per platform directly from the Bulk Entry view — handy when you want to update values for a single platform without leaving the snapshot creation workflow. See Bulk Entry for details.
See also
- CSV Format Reference: Detailed column specifications and example files
- Snapshots: Understand how snapshots work
- Bulk Entry: Enter values for all assets in a single session, with per-platform CSV import
- Cash Flows: Learn more about tracking deposits and withdrawals